I have recently been rejuvenating an old kitchen cabinet. Most people would have tossed it out, but my customer wanted to have it as the sink cabinet in her kitchen as part of her house renovation. While it just oozes with character and history, it also required a serious amount of work to bring it back to life. The cabinet came out of a house in Wembley which was built around 1934. During the 1980's, a new kitchen was installed, and the old cabinet went outside to become a potting table in the garden. There it stayed and was used as such for many years. The weather was not kind to it. When I first saw it at it's new home in Fremantle, it was awaiting some serious attention before it could be installed.
 |
| The cabinet door latches were too heavily rusted to be salvageable... |
A classic piece of Western Australian history.
What a mug! I forgot to get a photo before I started working on it. It is truly a classic piece of Western Australian 1930's construction. So here is a description: the cabinet was clearly made on site by a carpenter from materials used in the construction of the house. It was part of the role of the carpenter.
The cabinet is nearly 6 foot long, 18 inches wide, and about 40 inches tall. Pretty tall! The shelves were made from jarrah tongue and groove floorboards. The frame was made from 3"x 1 1/2" jarrah. The two doors on the front, the end panels, and the cabinet face were made from 4 1/2" x 5/8" thick jarrah V-joint lining board - the same stuff which was used for the old "ledge and brace" dunny doors. The doors have two cleats on the back which the lining boards are nailed onto - and the nails are clinched over behind the cleats. The doors are hanging on T-hinges. The colour was Battleship Grey, though it seems an earlier colour may have been white or whitewash. An undercoat? It seems there was no other coat of paint ever applied to it. The backing of the cabinet was rough sawn boards of Yellow Pine, about 7" wide, edge butted together. The whole thing was held together with a variety of nails. The cabinet top was one of those old wooden ones. These were usually made from Kauri Pine or Hoop Pine. The enamel bowl would have been suspended underneath the hole in the sink top, and draining grooves were planed in the sink top radiating towards the bowl. Interesting to remember that once these wooden benchtops were normal. The cabinet was in a bad way, with most of the nails loose so the whole thing wobbled around. There was some rot in the shelving, in the base of the backing and the base of the cabinet ends. The top itself was very badly split from being in the weather for years. Most of the original top would not be re-useable for the benchtop.
 |
| Face down on a set of saw horses, the back has been removed. |
 |
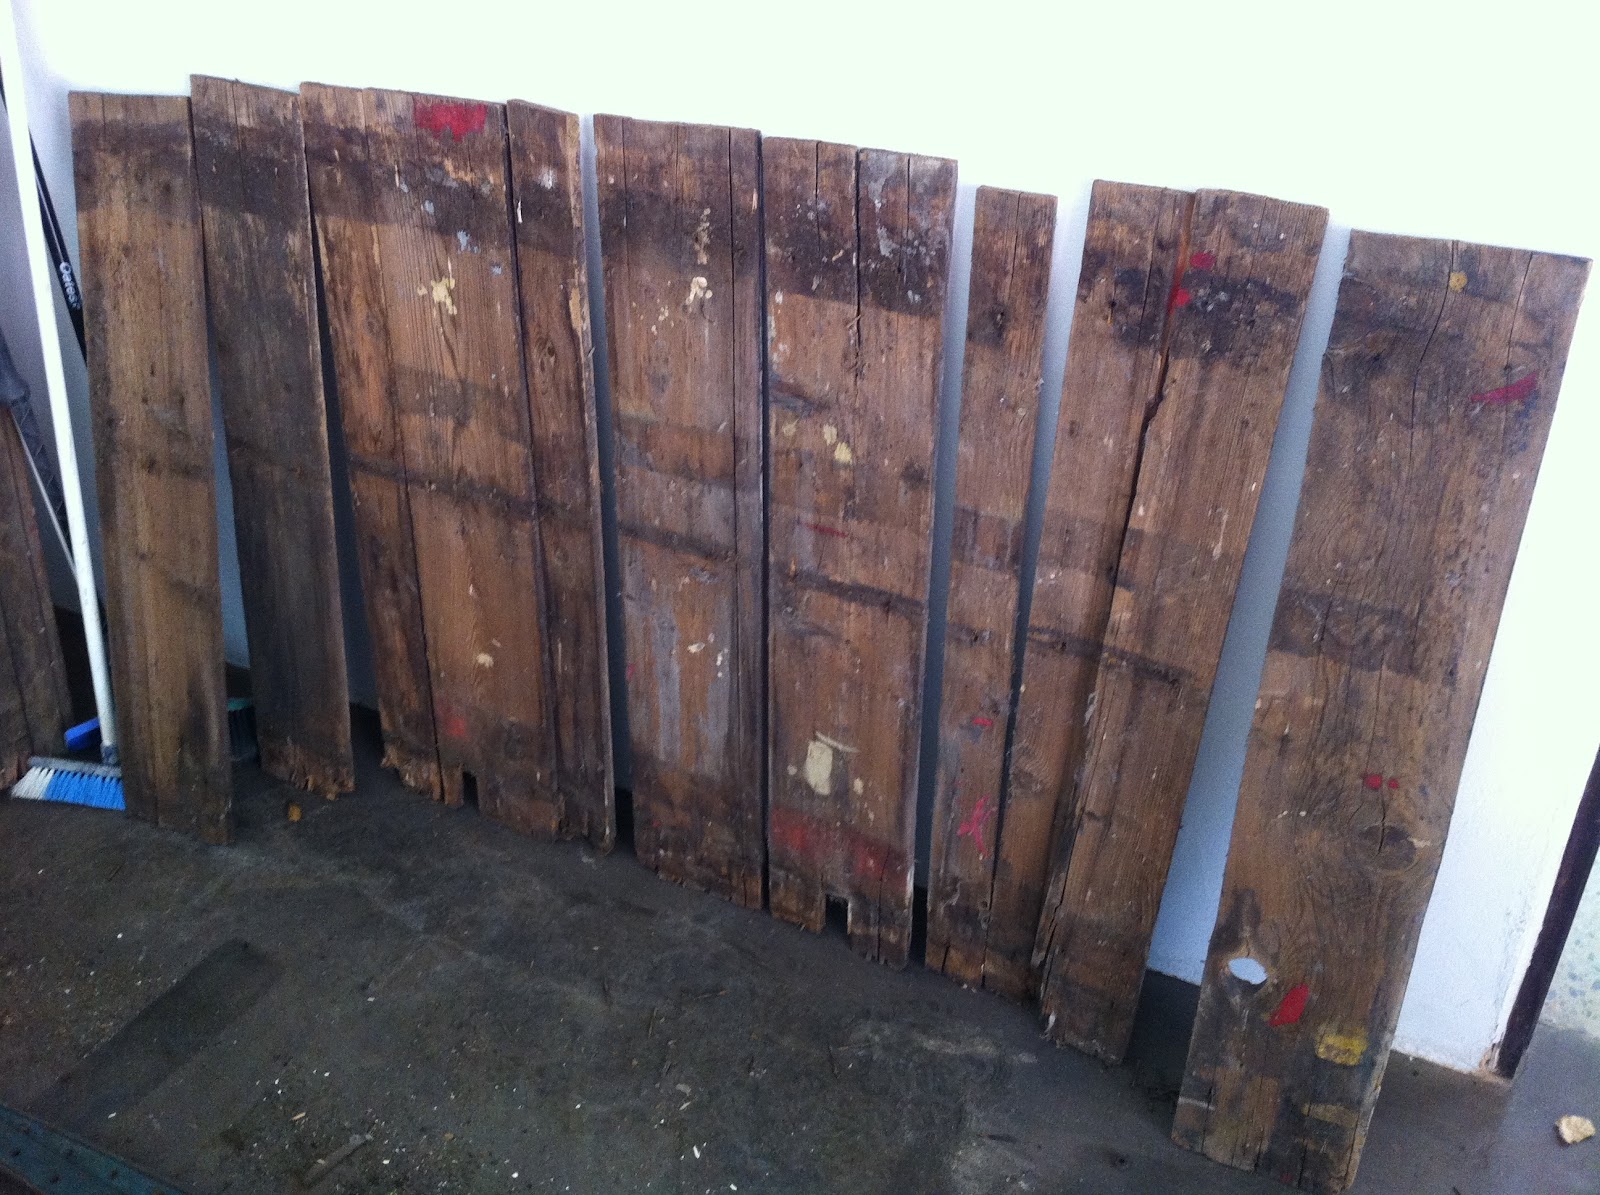
| The Yellow Pine backing boards, lined up in order. Plenty of rot at their bases. |
 |
| The other wooden sink top, the spare one. |
 |
| The rear of one of the doors. Note the clinched nails on the cleats. |
In addition to breathing new life into the cabinet, it would also be modified so that it would fit into a recess behind the new cabinet position in the kitchen.
Steps to a new life for the cabinet.
1. The backing boards were removed. This enabled me to remove the rotten boards in the shelving, and replace them. The shelving was screwed down onto the cabinet frame.
2. I squeezed up the lining boards on the cabinet ends with sash cramps, at the same time as squaring up the ends. The lining boards were then re-nailed onto the end frames.
3. A new horizontal support was added under the rear base of the bottom shelf, to counteract the hammock shape of the bottom.
4. Additional stiles were added at the rear to accommodate the frame extension at the rear required to fit in the new kitchen location.
5. The cabinet was turned onto it's back, and the face firmed up. Too fragile to nail, I opted to screw the lining boards onto the face. Slotted screws were used, consistent with the era.
6. Using a big square and my 6 foot straightedge, a new top and bottom level was drawn onto the frame all round, and the I cut to these lines. By removing about 1/2" from the top and about 1" from the bottom, much of the rotten damaged ends of the lining boards were removed and the frame straightened up.
7. The new rear frame extension was completed, and the backing boards were shortened and re-fitted. Additional lining boards were used, from my stocks. These had come from a very old house in West Perth. Sometimes it is an advantage to be a wood bowerbird!
8. My customer wanted the old paintwork to be partly removed. So I removed the doors and used my belt sander, random orbital sander, and hand sanding to chew off the bulk of the paint. The result is very pleasing, and will eventually receive a clear coat of something -with echoes of the old colours coming through subtlely. Nice.
 |
| Removing the doors ready to clean off the bulk of the old paint. |
 |
| The chosen level of paint removal. Mostly jarrah showing, but with echoes of the old paint coming through... |
9. Time to put the cabinet into position. Using the old fashioned method, I placed the cabinet in position, packed it up so that it was level, and scribed the based to follow the contour of the kitchen floor where it would now live.
10. The holes were cut in the back of the rear frame extension to take the waste pipe, water pipes and power point. With this done, it was time to fix the cabinet in its new position.
11. The frame was bolted to the brickwork behind. The doors were still to be re-hung, after new catches could be found, and probably after the plumber has been - to make access easier. Time to measure up for the top which needs to be made to replace the old one and extend into the recess behind.
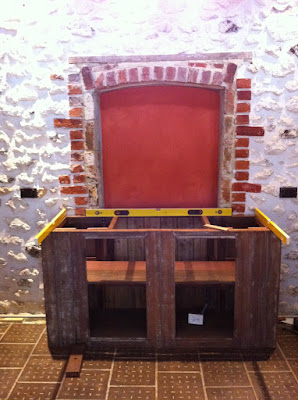 |
| The rejuvenated cabinet, with its new rear extension into the recess. Beautifully level. |
Making the new top.
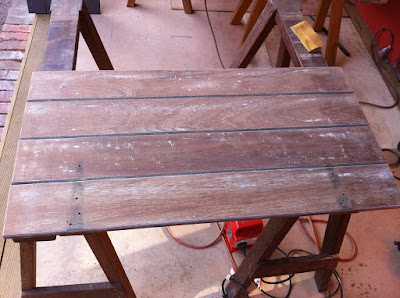
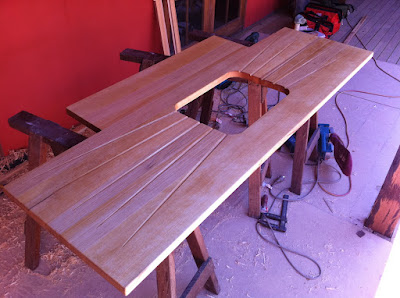
The original top was just too damaged to be usable in making up a suitable top - except for a strip along the front. My customer had another wooden top to toss into the mix, but it was not alot better. These tops were traditionally made from either Hoop Pine or Kauri Pine - though I do not claim to be able to tell the difference at this stage. My hunch is that the original top was made from Kauri Pine. With the new top to be bigger (extending into the recess behind) and the timber in the old tops being to badly split and rotten, we decided to create a whole new top. I was able to obtain a new 3.0m (10ft) length of kauri pine which was 250 x 75mm (10" x 3"). After ripping it down the middle, I was able to create two 10inch wide boards which were just over 30mm thick. From this I glued up the material for a whole new benchtop.
 |
| The oversized new top glued up, with epoxy resin this time. |
 |
My trusty Record No.0110 was used to clean off squeeze-out from the joints.
|
I gave the back of the sink top a sealing coat of Tung Oil/Orange Oil mix, and left it to dry a couple of days. I then took the top to my customers home to complete the sizing and fitting of the top. She'd had an old metal basin re-enamelled, so I would need to measure it carefully to be able to cut the hole in the benchtop.
 |
| The "bowl hole" cut out of the benchtop, but the top not sized yet. |
 |
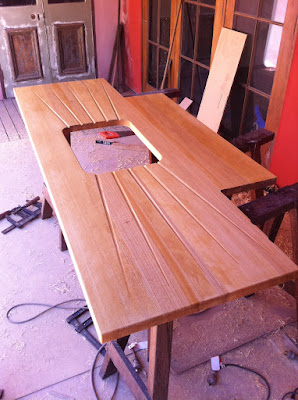
| Router jig used for cutting the drainage grooves. |
Making the drainage grooves was interesting. My Dad tells me the way it used to be done was a strip was pinned onto the sink top in the right position, and a moulding plane with a coving cutter was used to progressively cut each groove getting deeper as you approach the bowl hole. I did not have such a moulding plane, so I rigged up a jig for a router trimmer with a coving bit. By making a track for the router which was tapered in elevation by about 7mm over a 600mm length, I was able cramp it over each drain position and easily cut the drainage grooves. It worked a treat!
 |
| Drainage grooves completed, and top cut to size. Now for a test fit! |
After a couple of goes fitting the top to the brickwork surround while in position on the cabinet, it was time to do the final sanding and apply a coat of Orange Oil to the top. An hour later, I fixed the top to the cabinet frame.
 |
| Top now made, and first coat of Orange Oil applied. Looking good! |
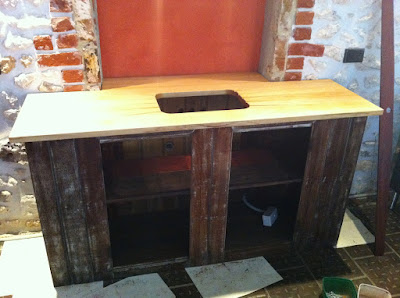 |
| Top now fixed down to the cabinet frame. |
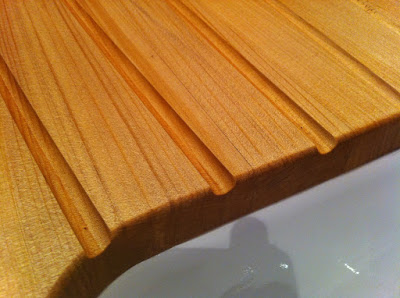 |
| Detail shot of the bowl edge and the drainage grooves. |
 |
| That nicely re-enamelled bowl looks pretty good under the new sink top. |
 |
| Job done. A new top like those which were common in the 1920's and 30's. |
I am particularly pleased the way the new top worked out. Lucky to be able to get some Kauri Pine which also happened to be quarter sawn. Ideal for the job. While the original top was just too degraded to be useable, there is a reasonable section of the front edge, about 5" wide, which could be re-cycled into breadboards for the kitchen. I've made the suggestion. The other top, the spare one, has a strip through the middle which is badly split. That could be cut out of it, and again I reckon the rest of the material is very recyclable. The decision to make a whole new top (and not to cobble together a mixture of the two old tops plus some new material) was a good one.
It's been a very interesting and enjoyable job to re-vitalise the old kitchen cabinet, and install it in it's new home. Although the top is new, the original cabinet from the 1930's has been given a new lease of life, extended to fit into the recess behind, and has pride of place in it's new home as the kitchen sink cabinet. The new top will soon look more aged through use, and down the track people will be amazed that such an old cabinet can be in such good condition! It also fits into it's new home very pleasingly. Once the plumber has come to hook it all up install the taps, we'll re-hang the doors. Might be worth an updated photo then, of the completed whole. Stay tuned for that one...
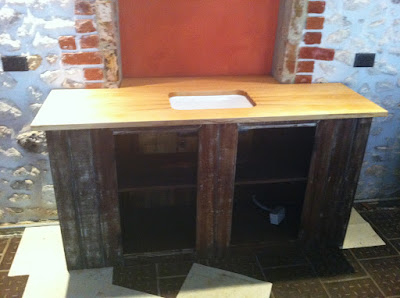 |
| After the plumber, the doors will go back on. What a glorious renewal... |
Thanks to my customer for seeing the potential in the rickety old kitchen cabinet, and for giving the the task and honour of bringing it back to life. That has certainly been done to great effect!
.jpg)