Some months after the
Big Flight was installed, the time had come for the Short Flight to be added. Much had happened in that period, including the installation of the underfloor heating, the laying of the jarrah floor over the top, the building and defining of the new wall and the opening in the upper floor, the plastering and gyprocking of walls and ceilings, and more. With the plastering of the walls completed and now dry enough, I was looking forward to working on the stairs again.
This staircase will have two sets of winding treads, separated by a pair of normal straight treads - which I shall refer to here as the Short Flight. Above the second set of winders will be the Big Flight. Below the first set of winders will be a couple of straight treads which will give a sense of "spilling out" into the hallway, wrapping around to meet the wall on either side of the staircase. Of course, then there's the handrail and the ballustrading upstairs! There's a way to go yet before this staircase saga is completed...
Back to the drawing board.
What a surprise! The actual measurements were checked against the original drawing, including the position of the tenon on the bottom of the Big Flight's inner stringer. This tenon would be fitted into the newel post which would be fitted around the wall in the opening of the wall.
 |
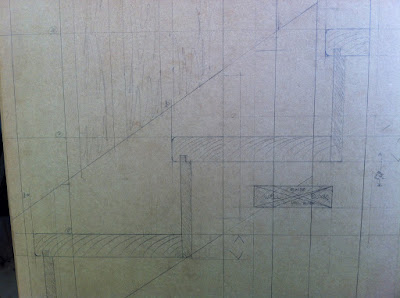
| The original full scale drawing. |
Essential to the short flight is the three newel posts which are part of this component of the staircase. The drawing above shows the relationship between these posts, the wall through which the stairs pass, the two sets of winders, the big flight, and of course the short flight of two straight treads.
Making the newel posts.
The only way to get 90 x 90 mm jarrah is to recycle old verandah posts, obtained from Salvage yards.
Buried under layers of old paint, it is a lucky dip until the material is machined up.
 |
| Amazing how many nails and screws are lurking under the layers of paint on the verandah posts. |
Two of the three newel posts required for this section will have a 30x30mm rebate out of them to fit around the wall snugly, through which the staircase will pass.
 |
| One part of the full scale drawing of the three newel posts and how they relate to the short stringer and the wall. |
The Handrail.
A short section of handrail/balustrading will extend between the two lower newel posts. My customer found a profile she liked on a US website, so I did some experimentation to see if I could get close. I found I could get close starting with 60x60mm material, the table saw, and three different router cutters! This profile will be used for all of the handrails to be added later. I made the short section I would need for this short flight section.
 |
| The handrail profile... and how to make something close! |
The balustrade panel.
Between the hand rail, the stringer and the posts either side, would be some balustrading. While discussing the design possibilities, we hit on the idea of matching the original entry hallway woodwork adjacent to the staircase. Brilliant! I grabbed a piece of drawing paper and a ladder, and did a tracing of the original tulip panel.
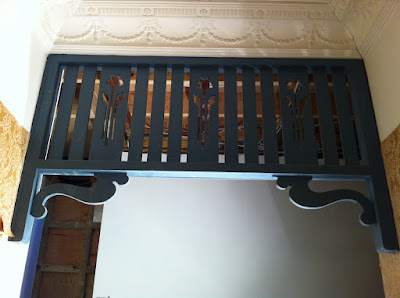 |
| The original decorative woodwork above the hallway. |
 |
| Tracing the tulip panel |
 |
| The tulip design was cut out and then used to draw around on the jarrah panel. |
 |
| I don't use my scroll saw often, but it's great for jobs like this. |
The panel was made! What a good idea. Time to put it all together.
Putting it all together.
Using the full scale drawing, all the components were cut to size and angle, the mortises chopped, the tenons cut, and every joint test fitted. Time consuming, but essential before doing a dry run cramping it all together. If it is all sweet, it will be disassembled and then glued up in situ.
 |
| All these angles are very tricky to cut and fit. I'd be lost without the full scale drawing to take measurements off. |
 |
| These two posts straddle the wall. The narrow panel will hide the wall end between the posts. |
 |
| Looking good for the test fit. |
With all the components and joints fitted, it was time to bite the bullet. Glue-up time, on situ.
 |
| The glue-up begins, That's the hole in the wall we are going through. |
 |
| The short flight starting to take shape. |
 |
| The short flight develops further. |
 |
| Another view. That's the big flight up around the corner. |
 |
| Another look. Yep, the tulip panel was a nice idea! |
Gluing all this up was a huge job. The upper post had the big flight's tenon housed into it as well as the nose of Tread#11. It had to be fitted around the wall, and the treads and a couple of risers put in place - as well as the balustrading/handrail, etc. All in all, I was very pleased the way it all came together.
The short flight was now in place. The next step would be to build the two sets of winding treads, which go either side of the short flight.
.jpg)